Do It Yourself Fence
CFC specializes in providing quality installations, but what some people may not know is that we also have one of the largest selections of fencing materials in Utah. From composite, wood or iron, we have all the items you need to build your own fence. Additionally, we provide detailed instruction guides for our customers that can help you every step of the way. If you are looking to build your own fence, we can help!


Fence Installation Tricks
Ever wanted to build your own fence but simply didn’t know where to start? CFC can help. If you are looking to build just a basic wood fence, or a more elaborate structure we have step by step instructions to help you along the way. Here are some tips and tricks that may help you.
Choosing Fasteners
When choosing materials for a fence you want to be sure you are getting the correct amount and that you have the correct tools for your fence. When purchasing fasteners (screws, nails, etc.) for your fence it’s important to remember, that all screws are not created equally. If you are building a standard Dog Ear or Flat Top fence you will want to use our 1 5/8” screws. If you are building a Canyon Winds or Estates fence (neighbor-friendly designs with overlapping boards), you will want to use the 3” fasteners. For those types of fences, that extra length will ensure that the overlapping boards (slats) and top caps stay firmly secured and will add security and longevity to your fence. If you prefer to use nails instead of screws to construct your fence, you will need a roofing nail gun and compressor. Often times if you do not have the equipment needed, many hardware stores rent tools.
Choosing and Setting Posts
One of the most important steps in constructing your fence is digging holes and setting posts. Based on using a standard 6x6x8 post, the holes should be 12” in diameter and 24-30” deep (for a 4×4 post, you will want an 8” diameter). The holes should be dug so that they allow equal amounts of concrete on all sides of the posts.


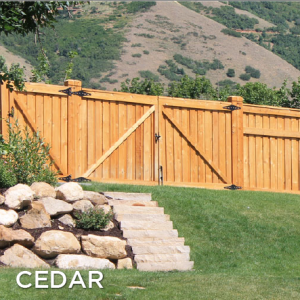
Our cedar posts come to us from the mill pre-cut with a standard flat top. If you want to add more to your fence, try beveling the tops of the posts. This goes relatively quickly. Once your posts are set, string your line across the top of the posts to check to see if the line is level. Once you have leveled all your posts, you can bevel the posts. Using a Skill Saw, angle the blade 45 degrees and cut each side of the post. If you don’t want to bevel the posts yourself, CFC can bevel them for you for $4.00 per post. We can even do a Gothic Cut (routed and beveled) to add an even more unique look. If you choose to pre-bevel your posts, you will need to set the posts to height once the concrete sets.
Setting Posts in Concrete
How many of us have felt the frustration and stress of concrete? Here at CFC we have a trick that can help out any fence builder. Instead of mixing the concrete by hand, then having to move the bucket and pouring the mix into the hole, try out our slick trick for mixing concrete.
After your holes are dug, pour half of the amount needed for one post hole directly into the hole. Next pour half the water you need, then mix with a steel rod. Pour the rest of the concrete and water into the hole while continually mixing the concrete with the rod. Be sure to remember and check to see if the post is plumb- or leveled straight up and down. Come back five minutes later to check the plumbing. Leave for 24-48 hours then once the concrete is set, you can continue to build the sections of your fence. It’s as simple as that! No more frustration, mess or stress.
Leveling and finishing
When you are to the point of building sections, the next step is to add top, bottom, and/or mid rails. To do this you can either toenail the rails into the posts by nailing in the nail at an angle. Or to save the hassle, you can use our fence brackets. Simply attach the fence brackets to the post and slide the rail into the bracket. Remember to take into account grade changes. Measure your rails between posts, mark and cut off an excess material. This will ensure a level fence.


Staining
Staining cedar fences is a crucial part of the process. Staining protects your fence from weathering, drying, warping, and other natural weathering. While it will not completely stop these processes, it will protect your fence and keep it looking nice for years to come. We recommend buying or renting a stain sprayer, however, you can always brush or roll your stain on. When staining your fence with a sprayer make sure to lay some cardboard or plastic on the ground and near your home or anything you don’t want to stain. This will protect your home and other property from being damaged from overspray.
